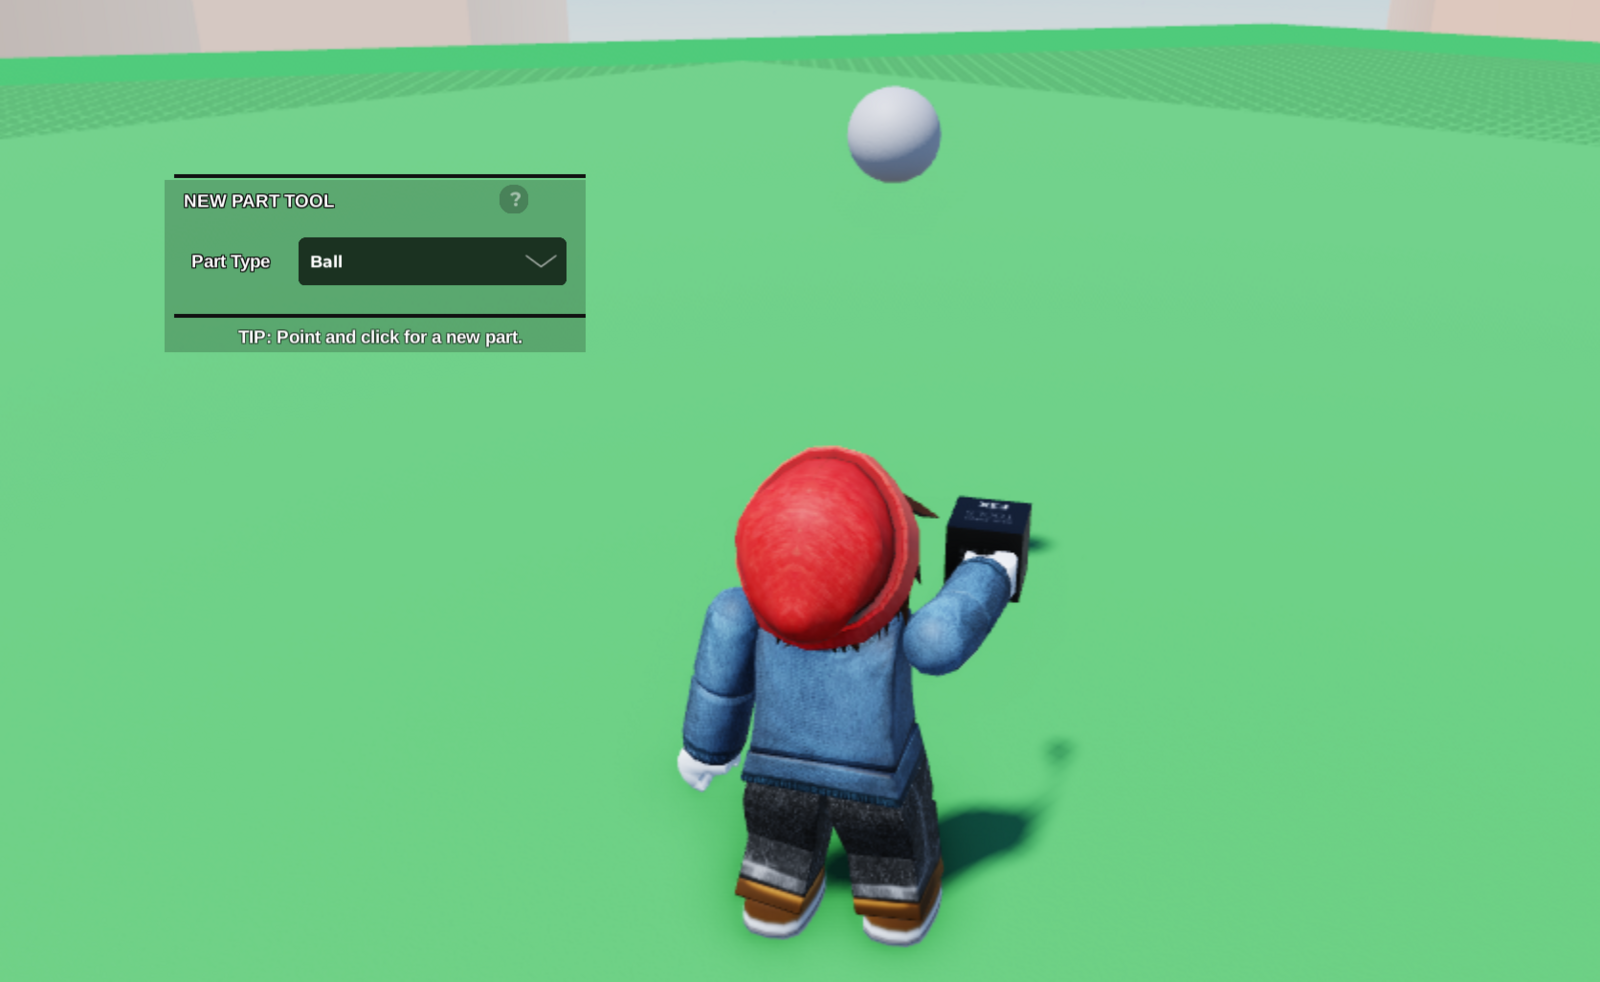
- Start by using the New Part Tool to create the part you want change the colour of.
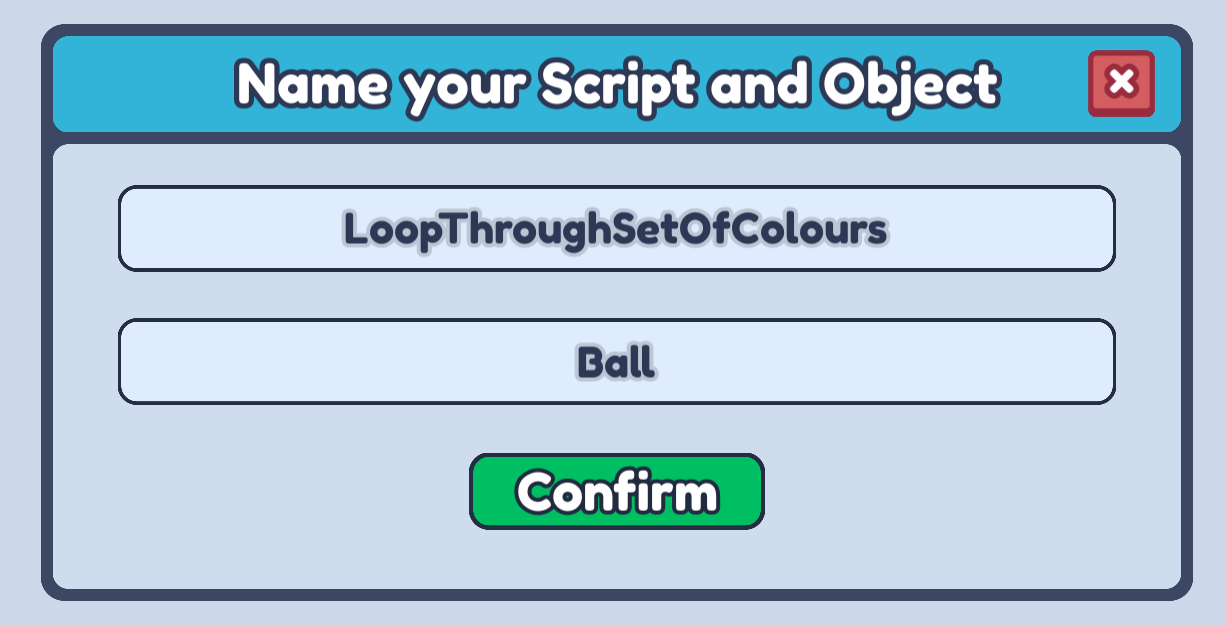
- Next, open up the Code Builder for that part and make a new script. You can name it anything that describes what the script is going to do!
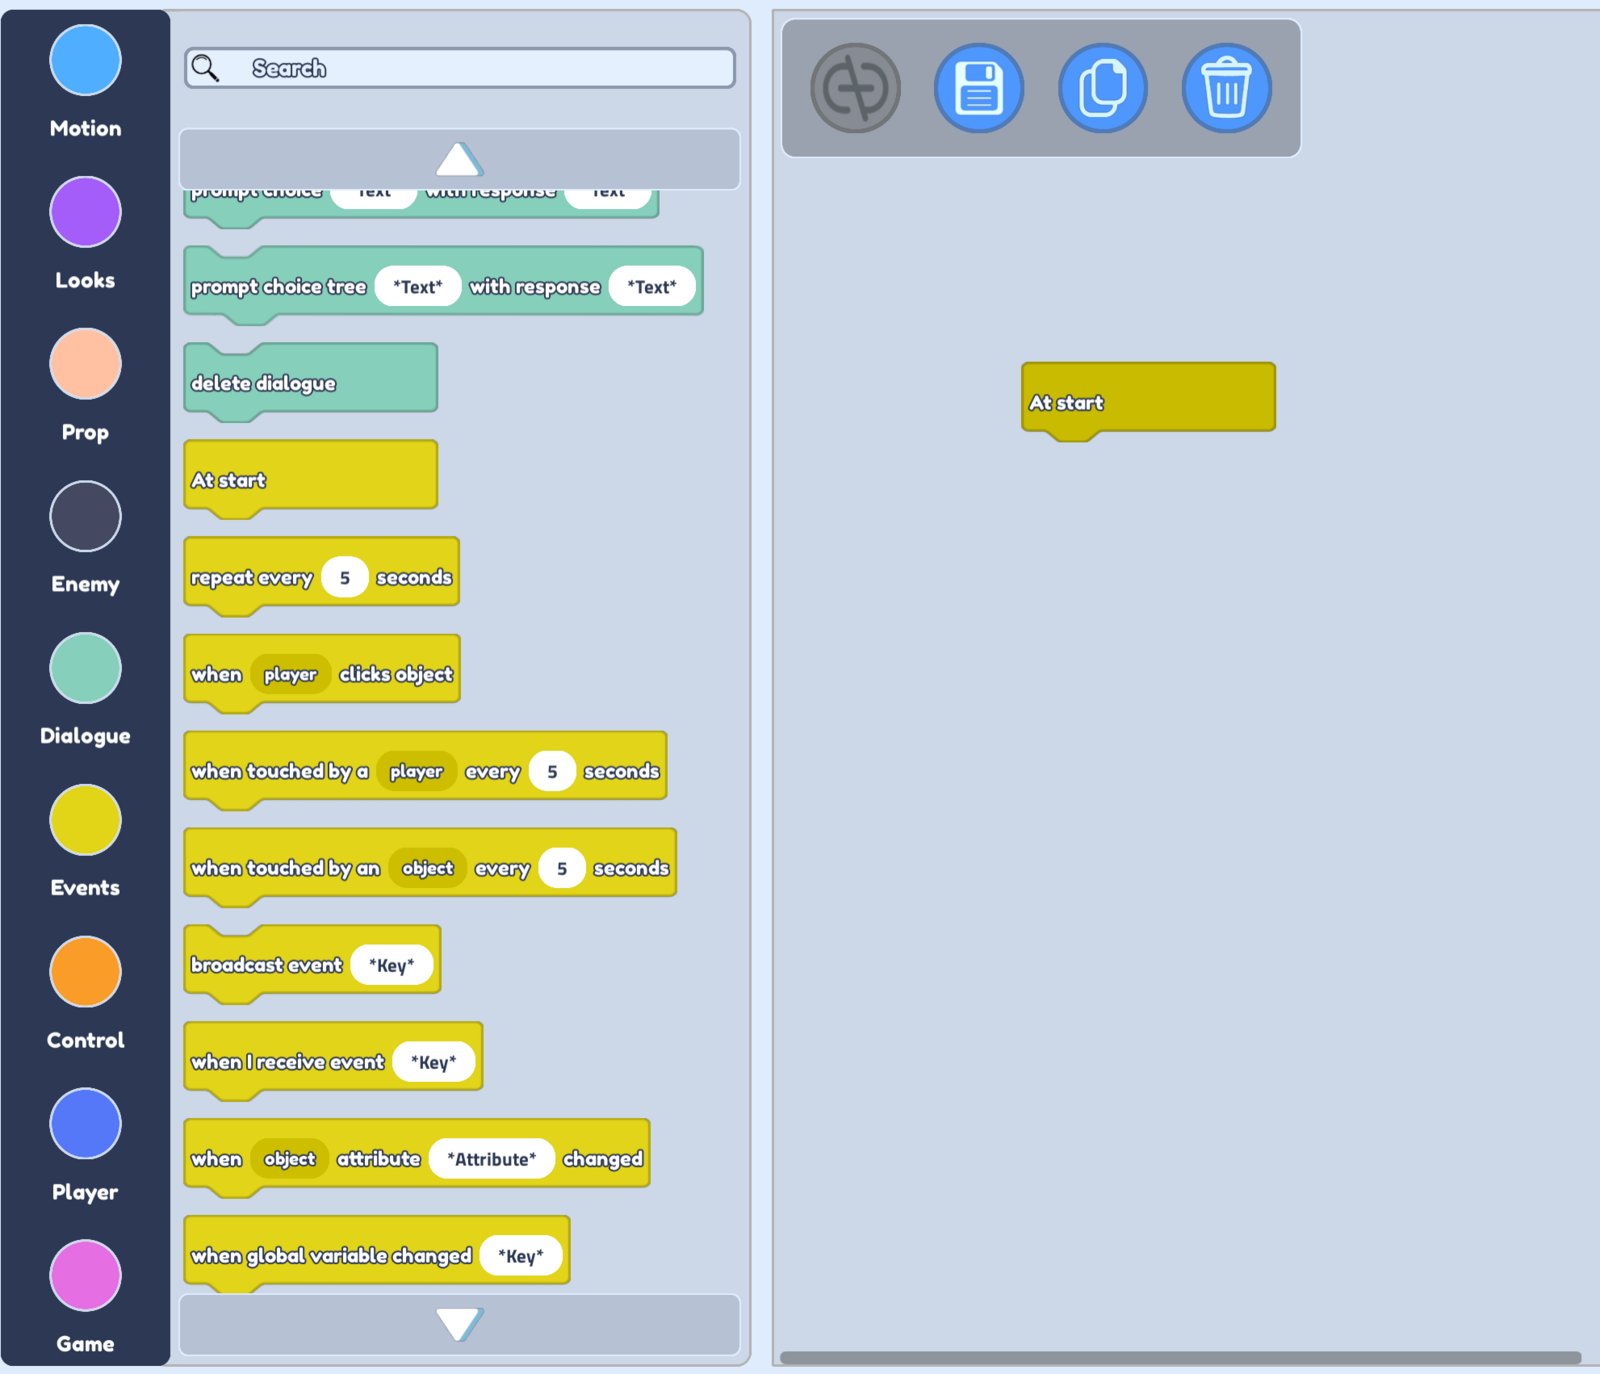
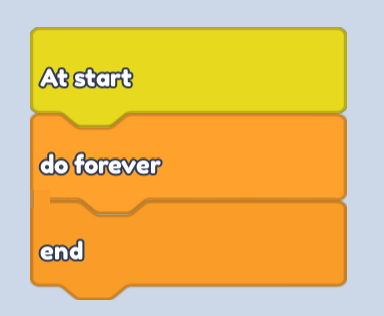
- We want our part to start changing colours when the game starts, so let's select our Events option on the left.

- Now we can drag the At start block into our scripting area.
- We will want our object to keep changing colour for as long as our game lasts, so let's open our Control blocks and drag in a do forever block.
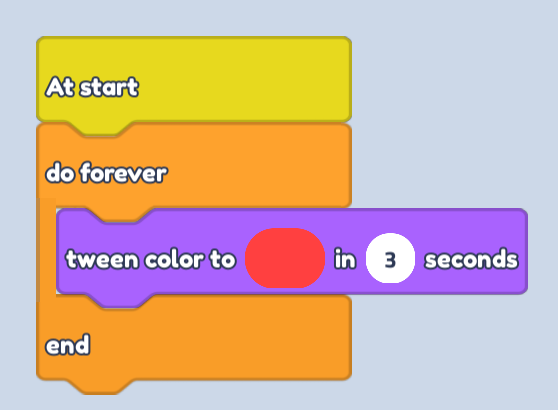
- To change how our object looks, we will of course open up our Looks blocks. From there we can drag in a tween color to block. You can choose whatever colour you like, and whatever seconds you like too!
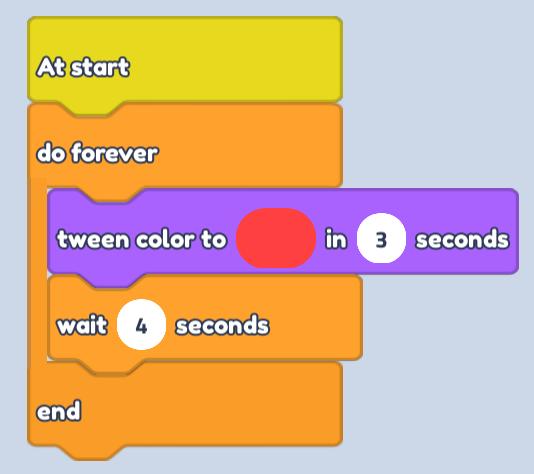
- Now let's add a wait block from our Control options. It is good to have a wait block with higher seconds than our tween block, just to make sure that our colour change has finished before we move onto the next!
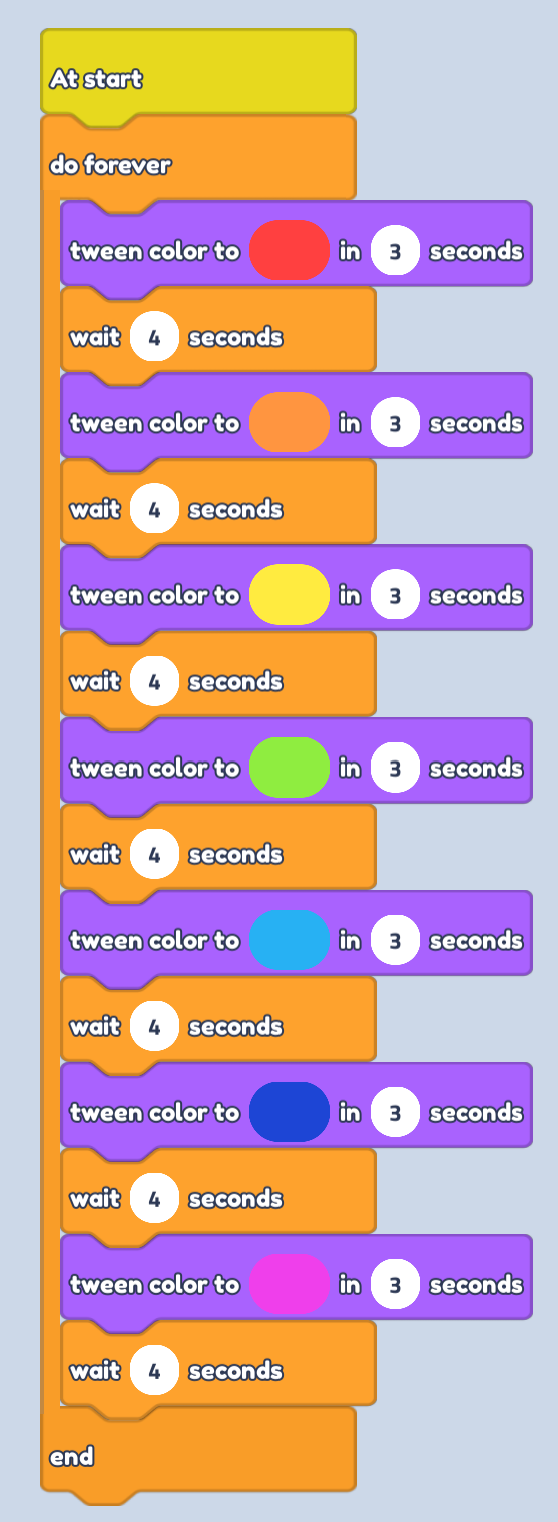
- From here it's simple! We can add as many tween and wait blocks as we like, our object will then change between these colours for the entire game. The image below shows us how to loop through the colours of the rainbow!
- Now you can save your script and watch your object change colours in your game!
Tip: Increase the seconds on the tween color to block to make the colour change slower.
Tip: Increase the seconds in the wait block to stay on a colour for longer.