Make your own custom Roblox character in the Character Builder — swap out limbs, reshape and paint it, then publish it straight into your game. Here's the whole flow.
1. Open the Character Builder and pick a starting point
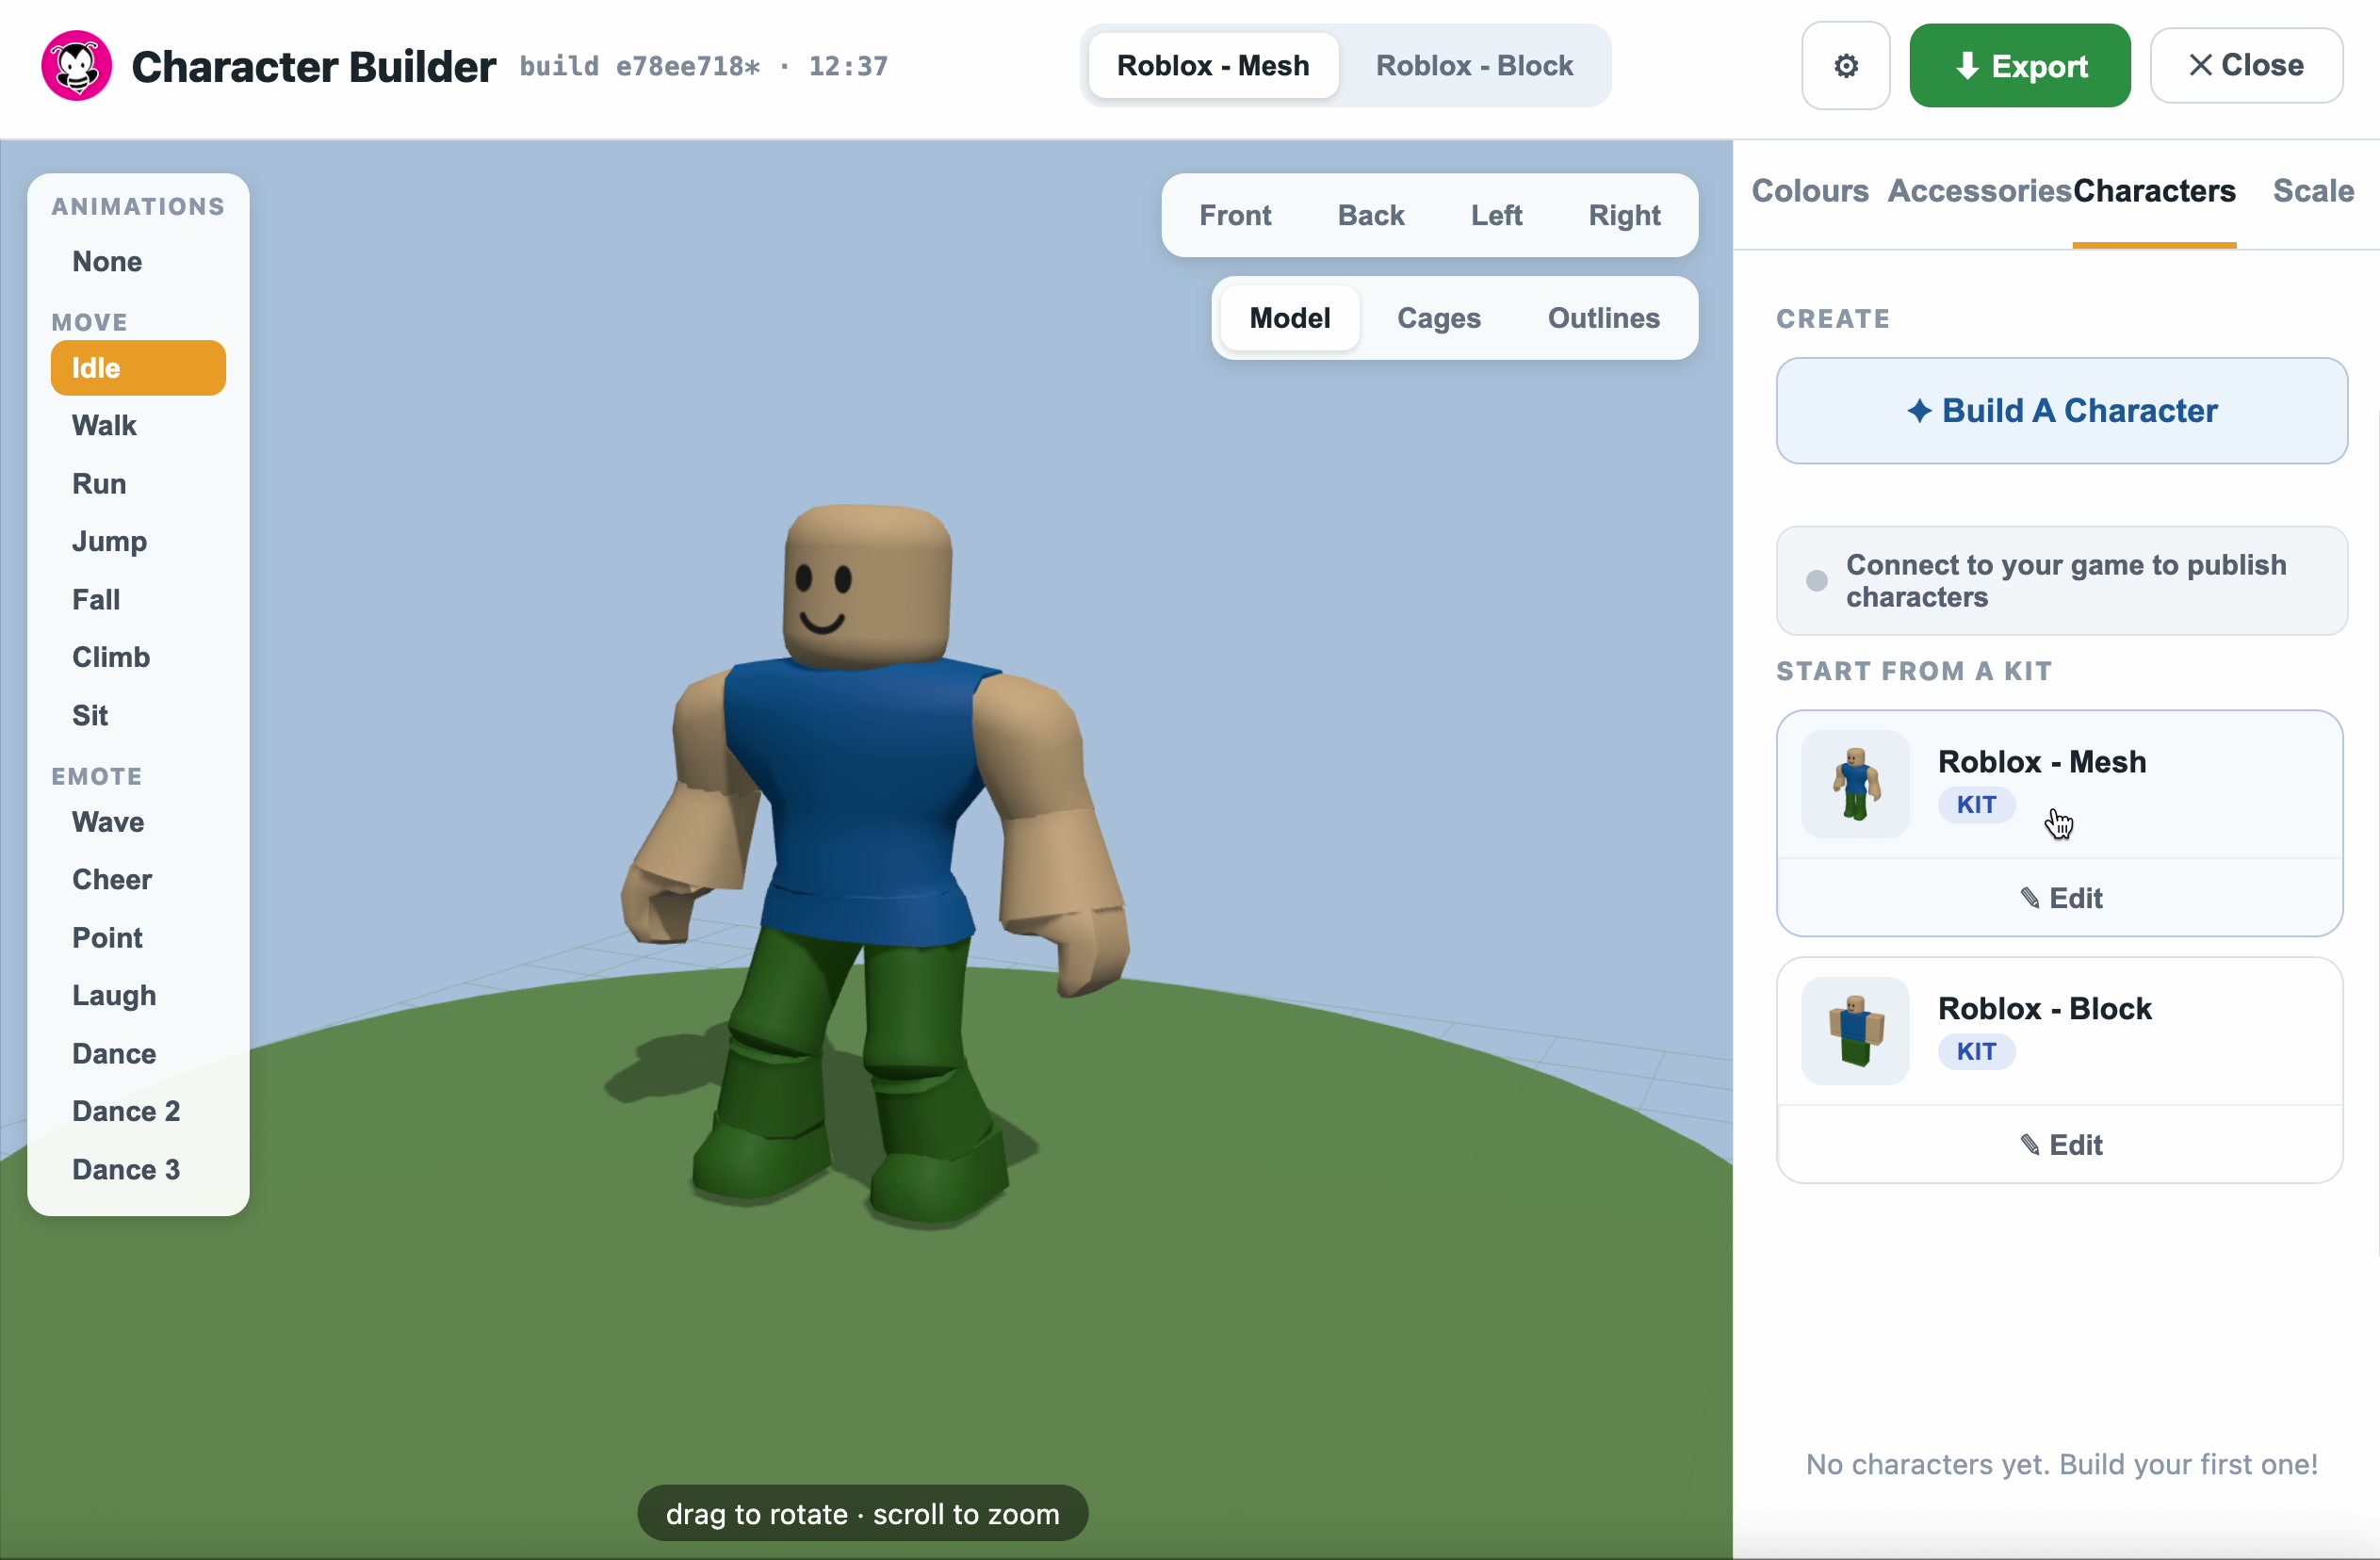
Open the Character Builder and go to the Characters tab. You've got two ways to start:
- Click Build A Character to start from scratch, or
- Under Start from a kit, pick Roblox - Mesh or Roblox - Block and click Edit to build on top of a ready-made character
2. Replace a limb with a new shape
You're now in build mode (Build your character). To swap out a body part:
- Under Add a part, pick a shape — Block, Ball, Cylinder or Wedge
- Use the Move tool and drag the new part toward the body part you're replacing
- When you get close, it snaps into place
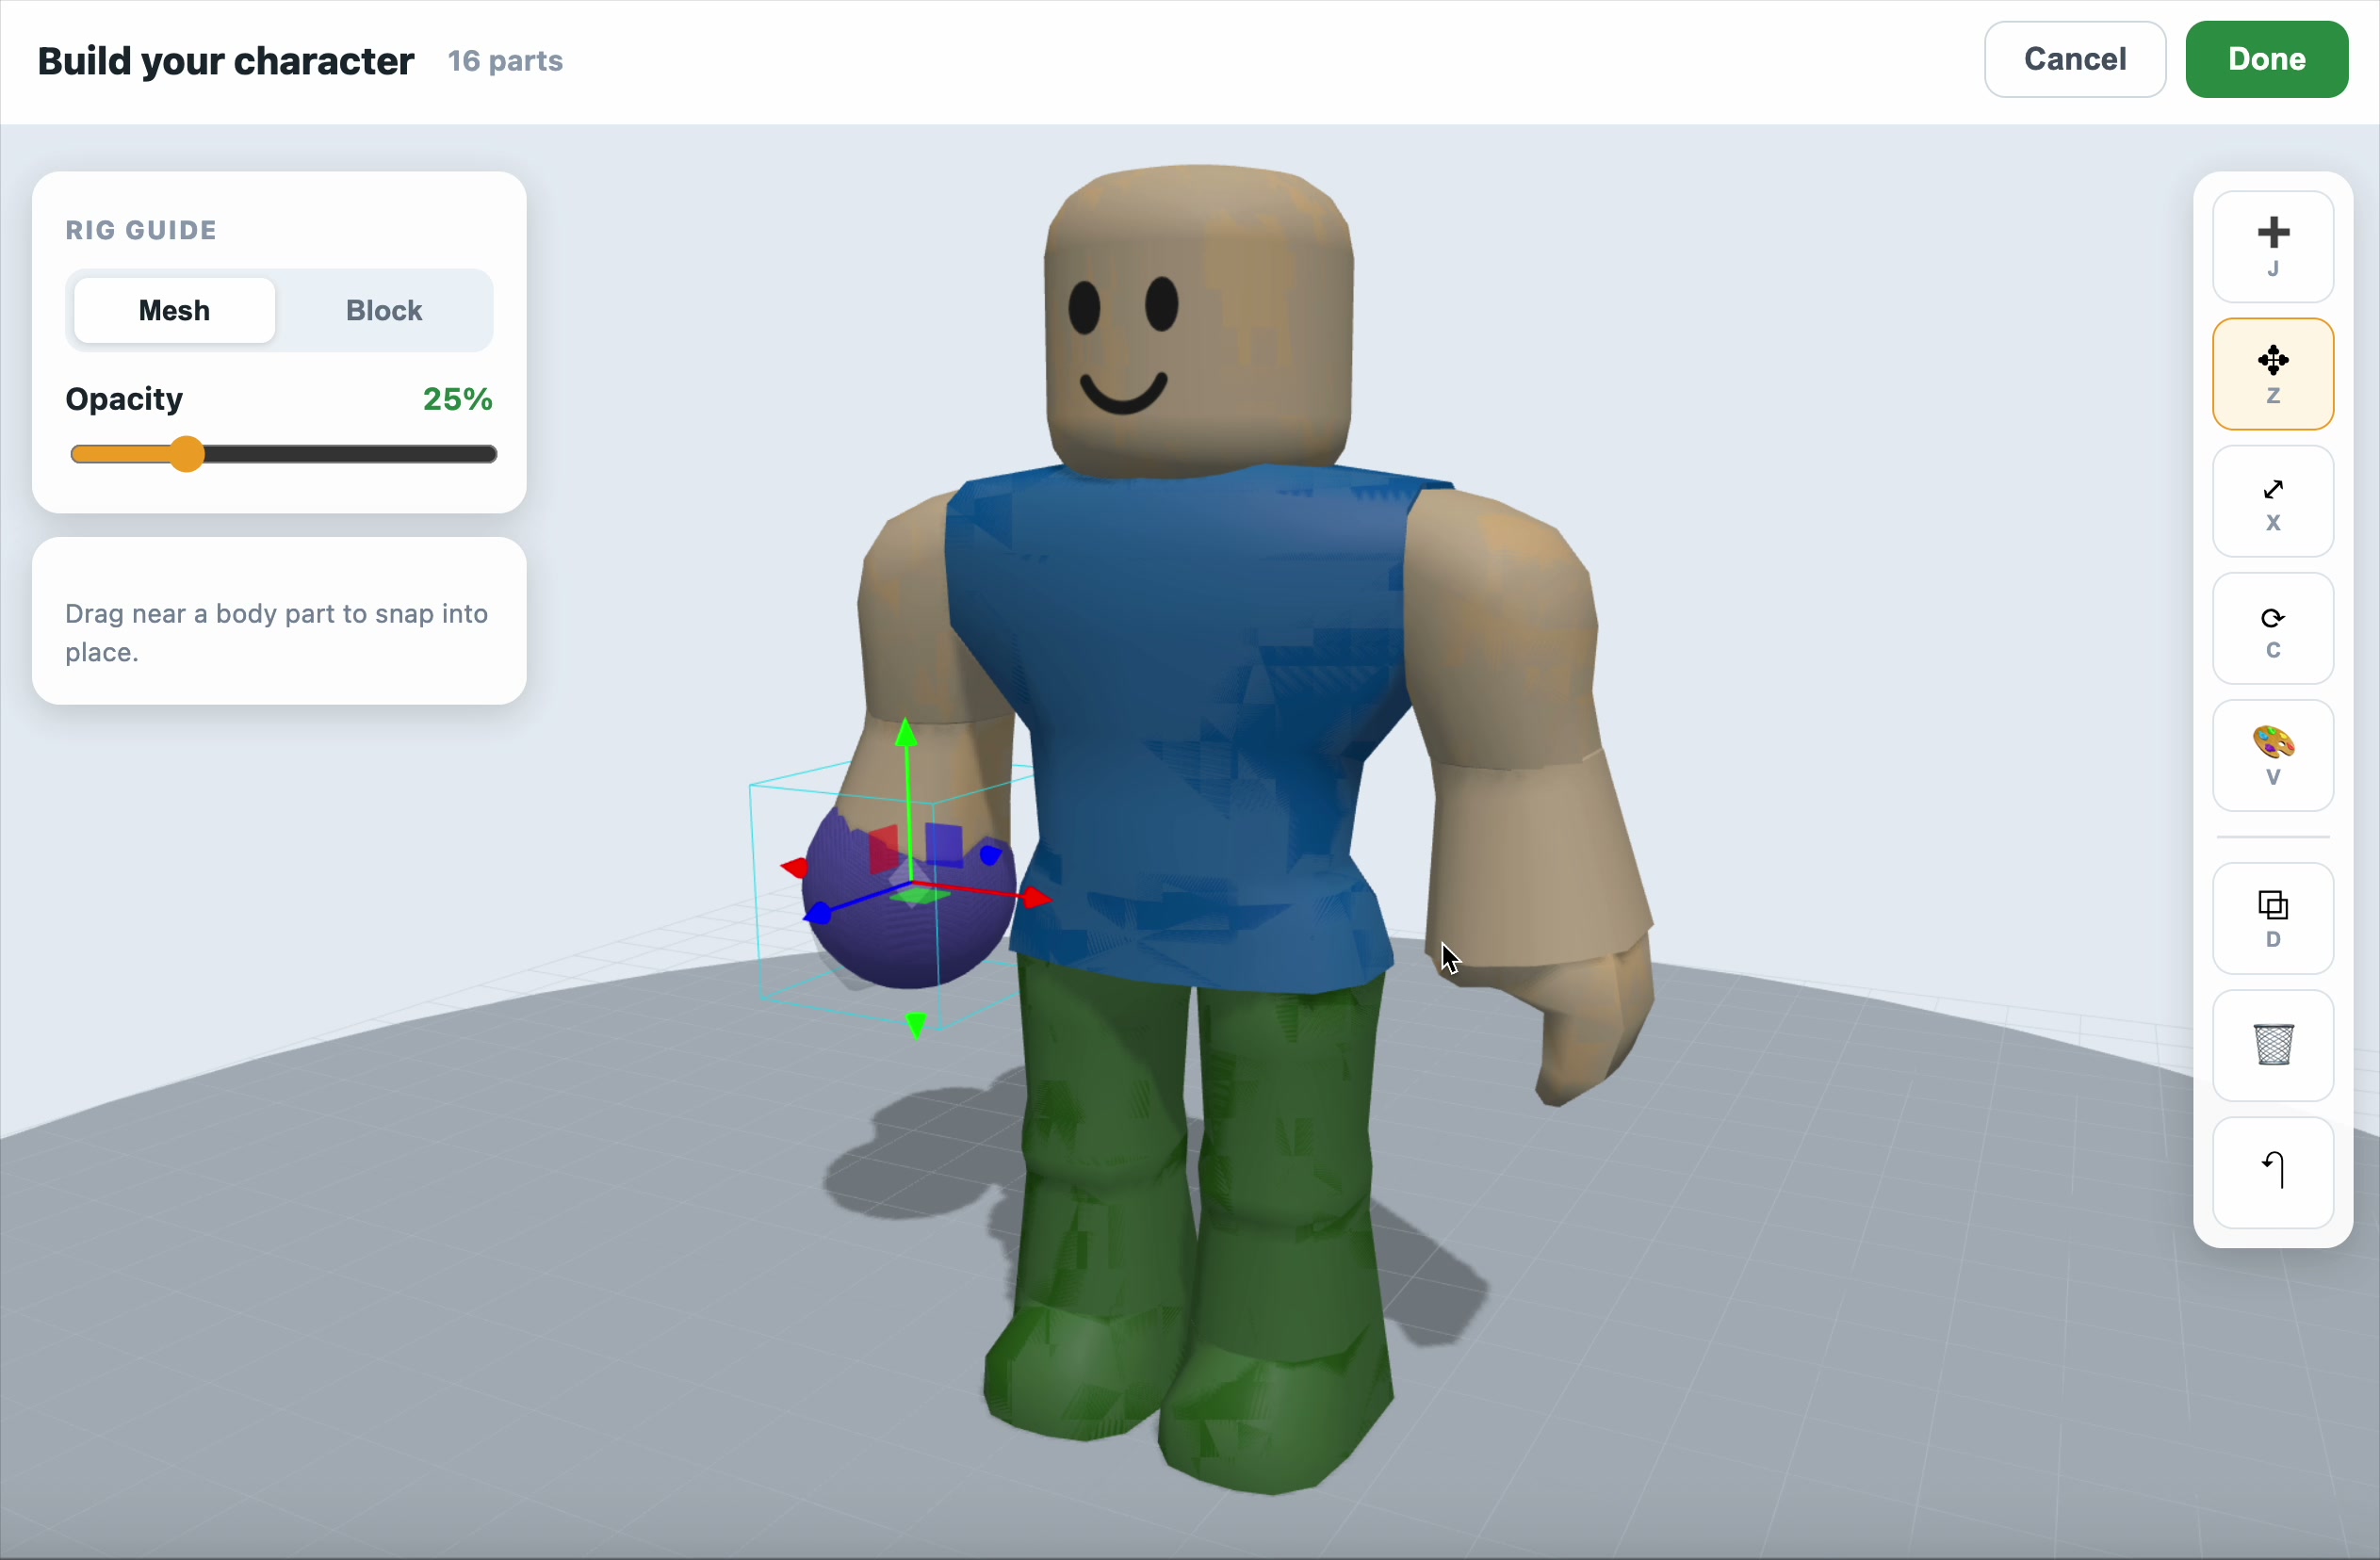
Tip: to match the other side, select your part and click Duplicate, then drag the copy onto the opposite limb.
3. Resize and reshape your parts
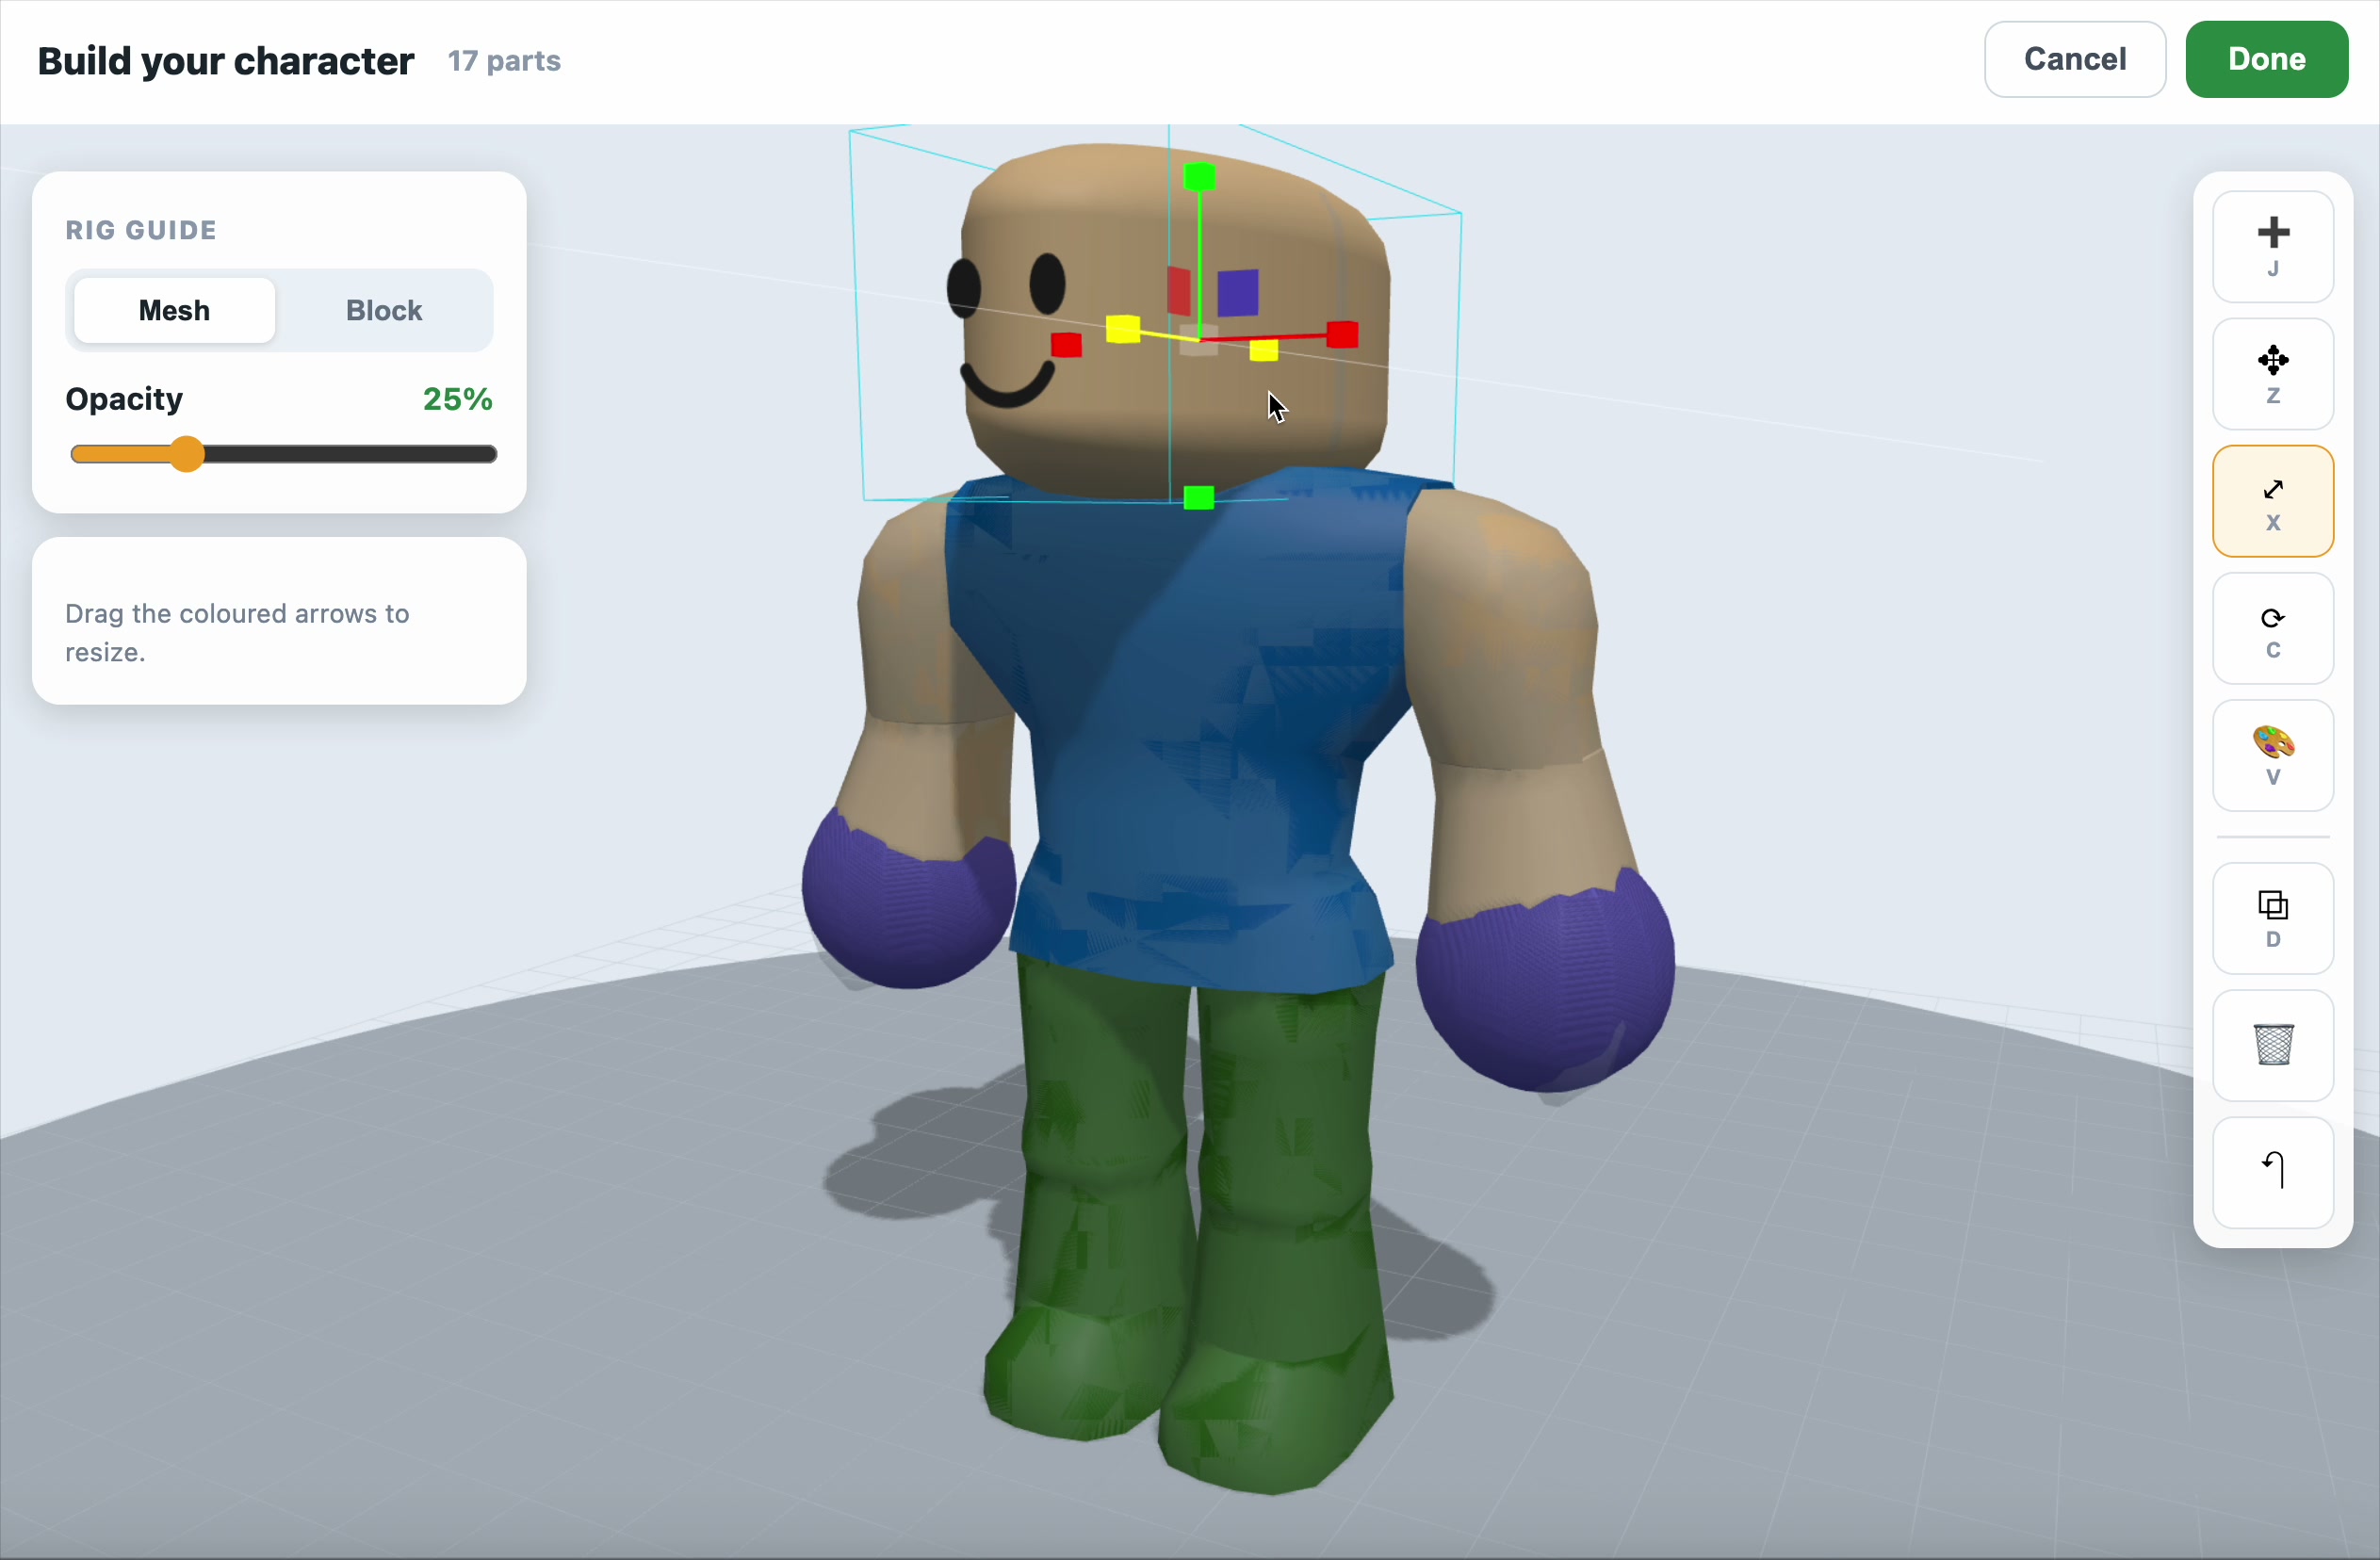
- Select a part and choose the Resize tool
- Drag the coloured arrows to make it bigger, smaller, longer or wider
4. Paint your character
- Choose the Paint tool (the palette)
- Click a colour, then click the parts you want to colour
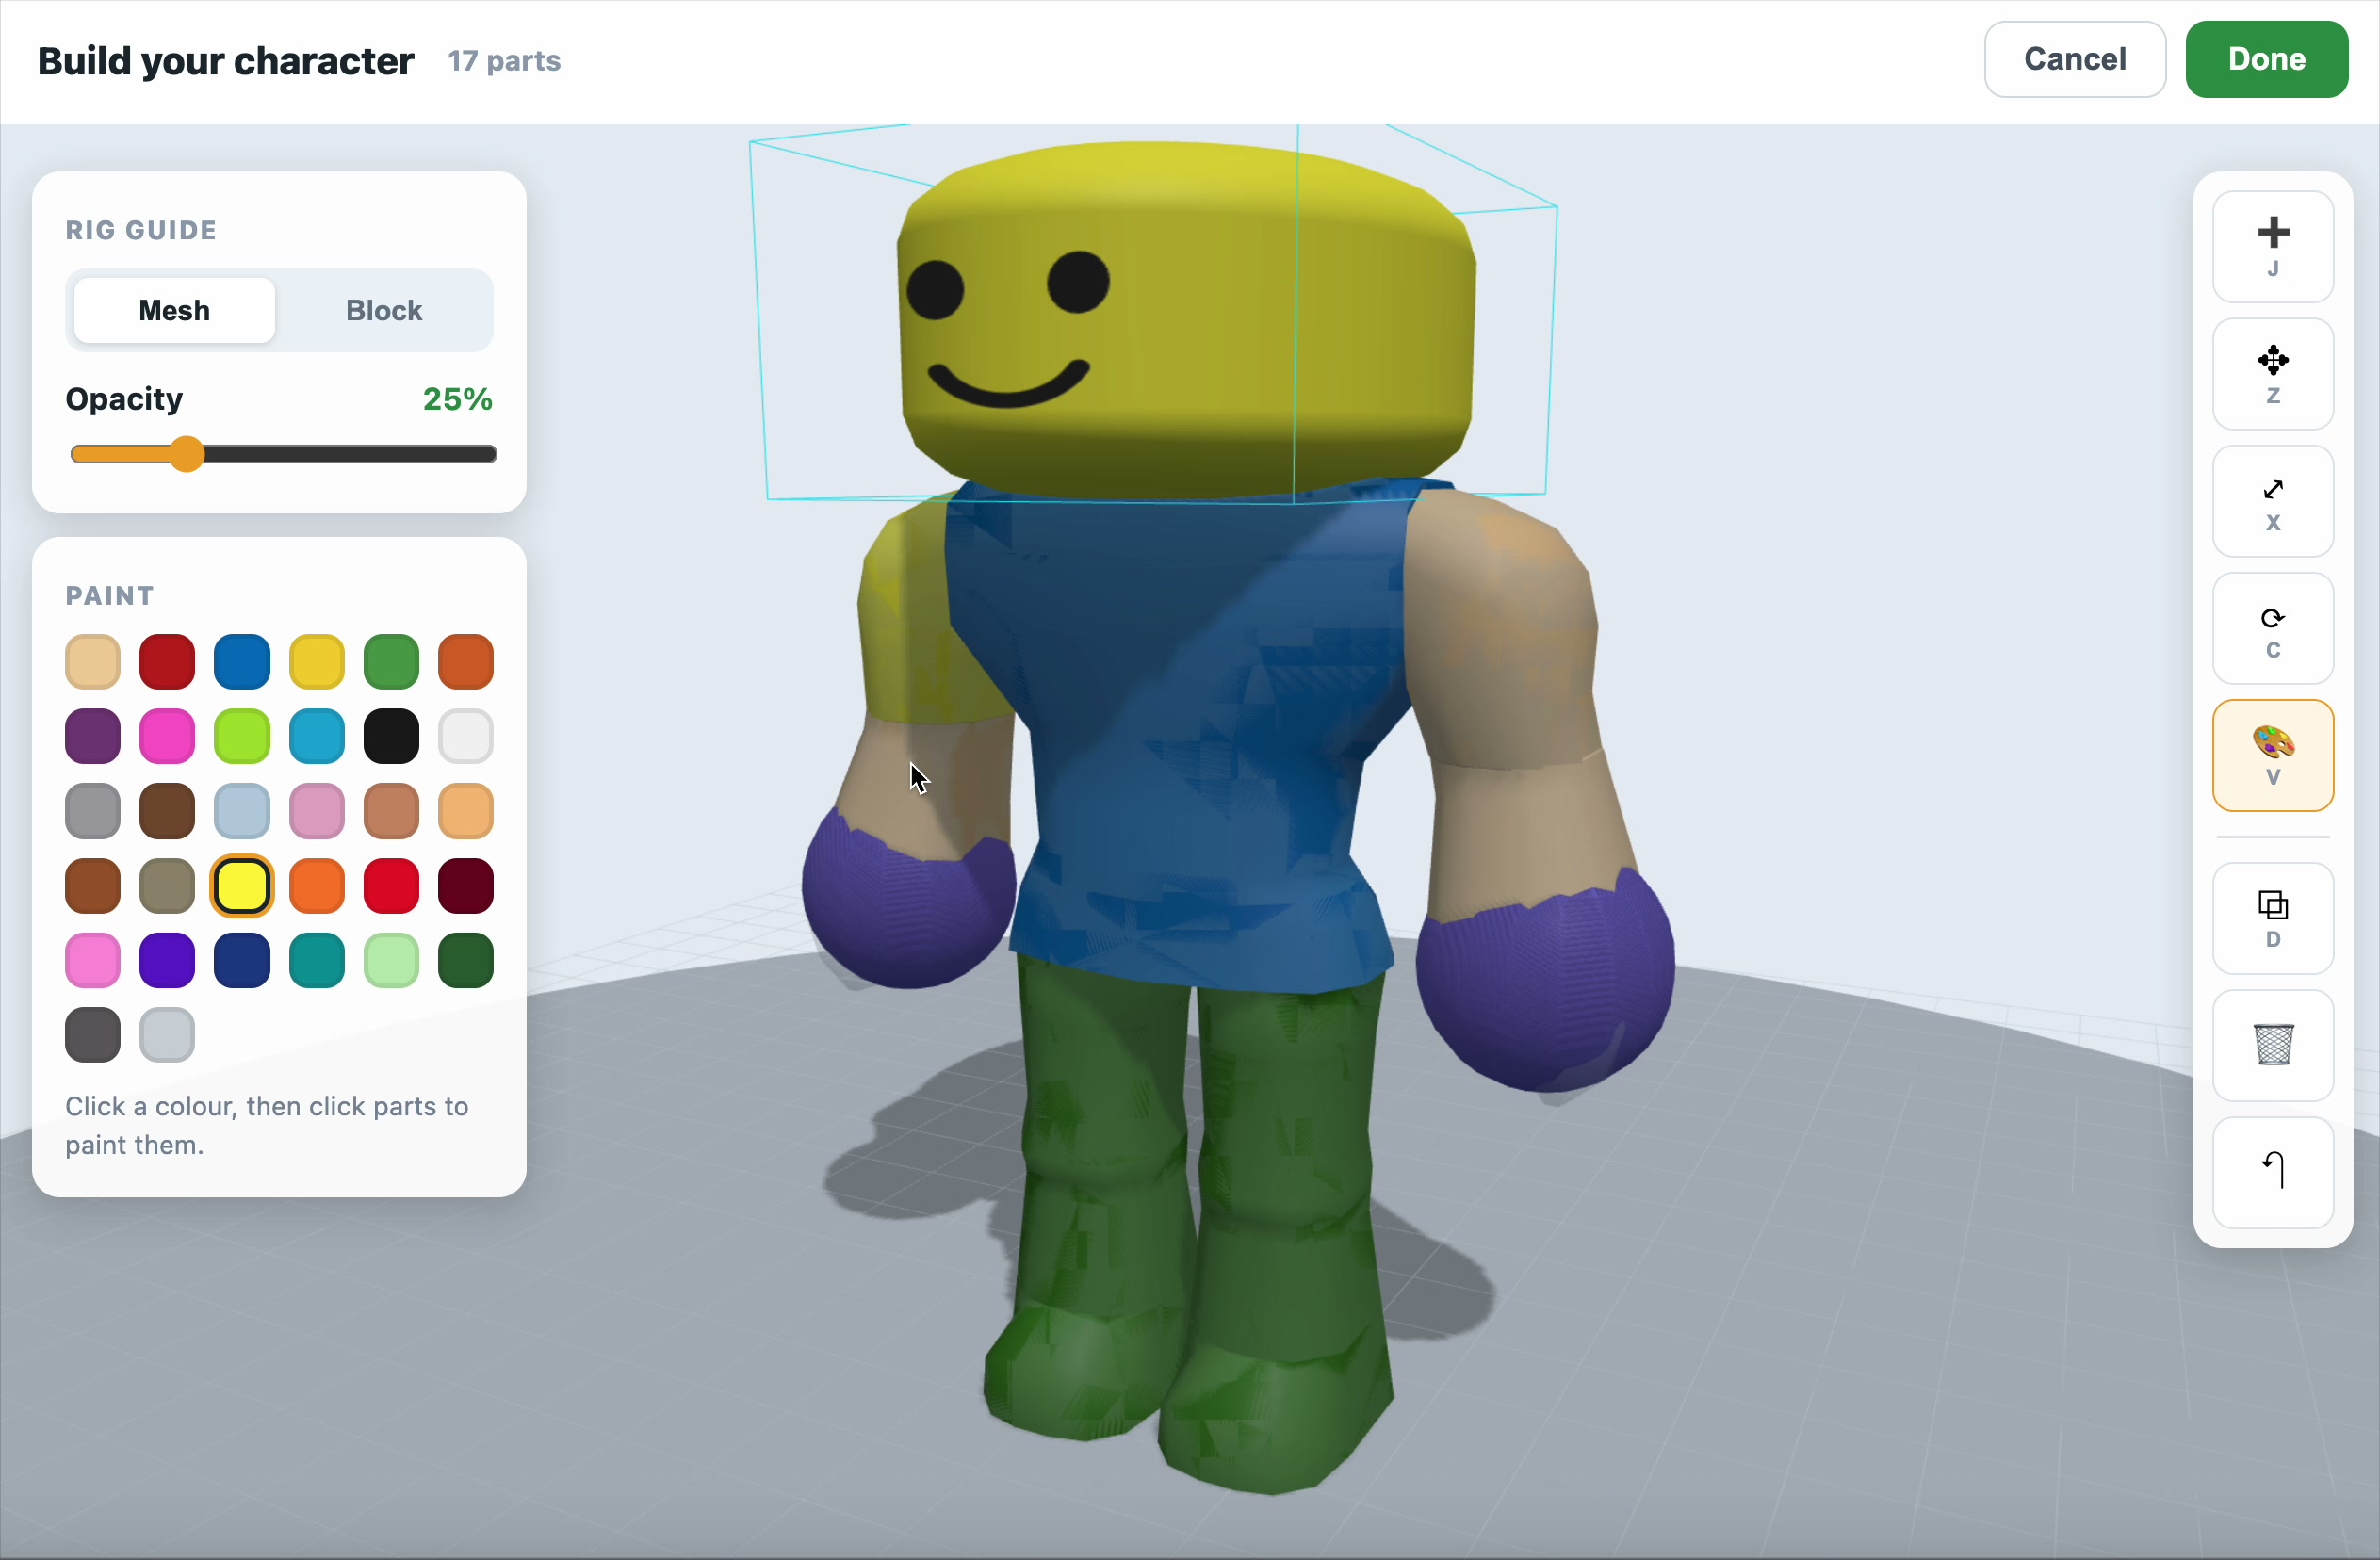
Use the Opacity slider on the Rig Guide if the guide character gets in the way while you build.
5. Save your character
When you're happy, click Done. Your character is saved under My Characters — take a look at it in the viewer and spin it round with the Front / Back / Left / Right buttons.
6. Connect to your game
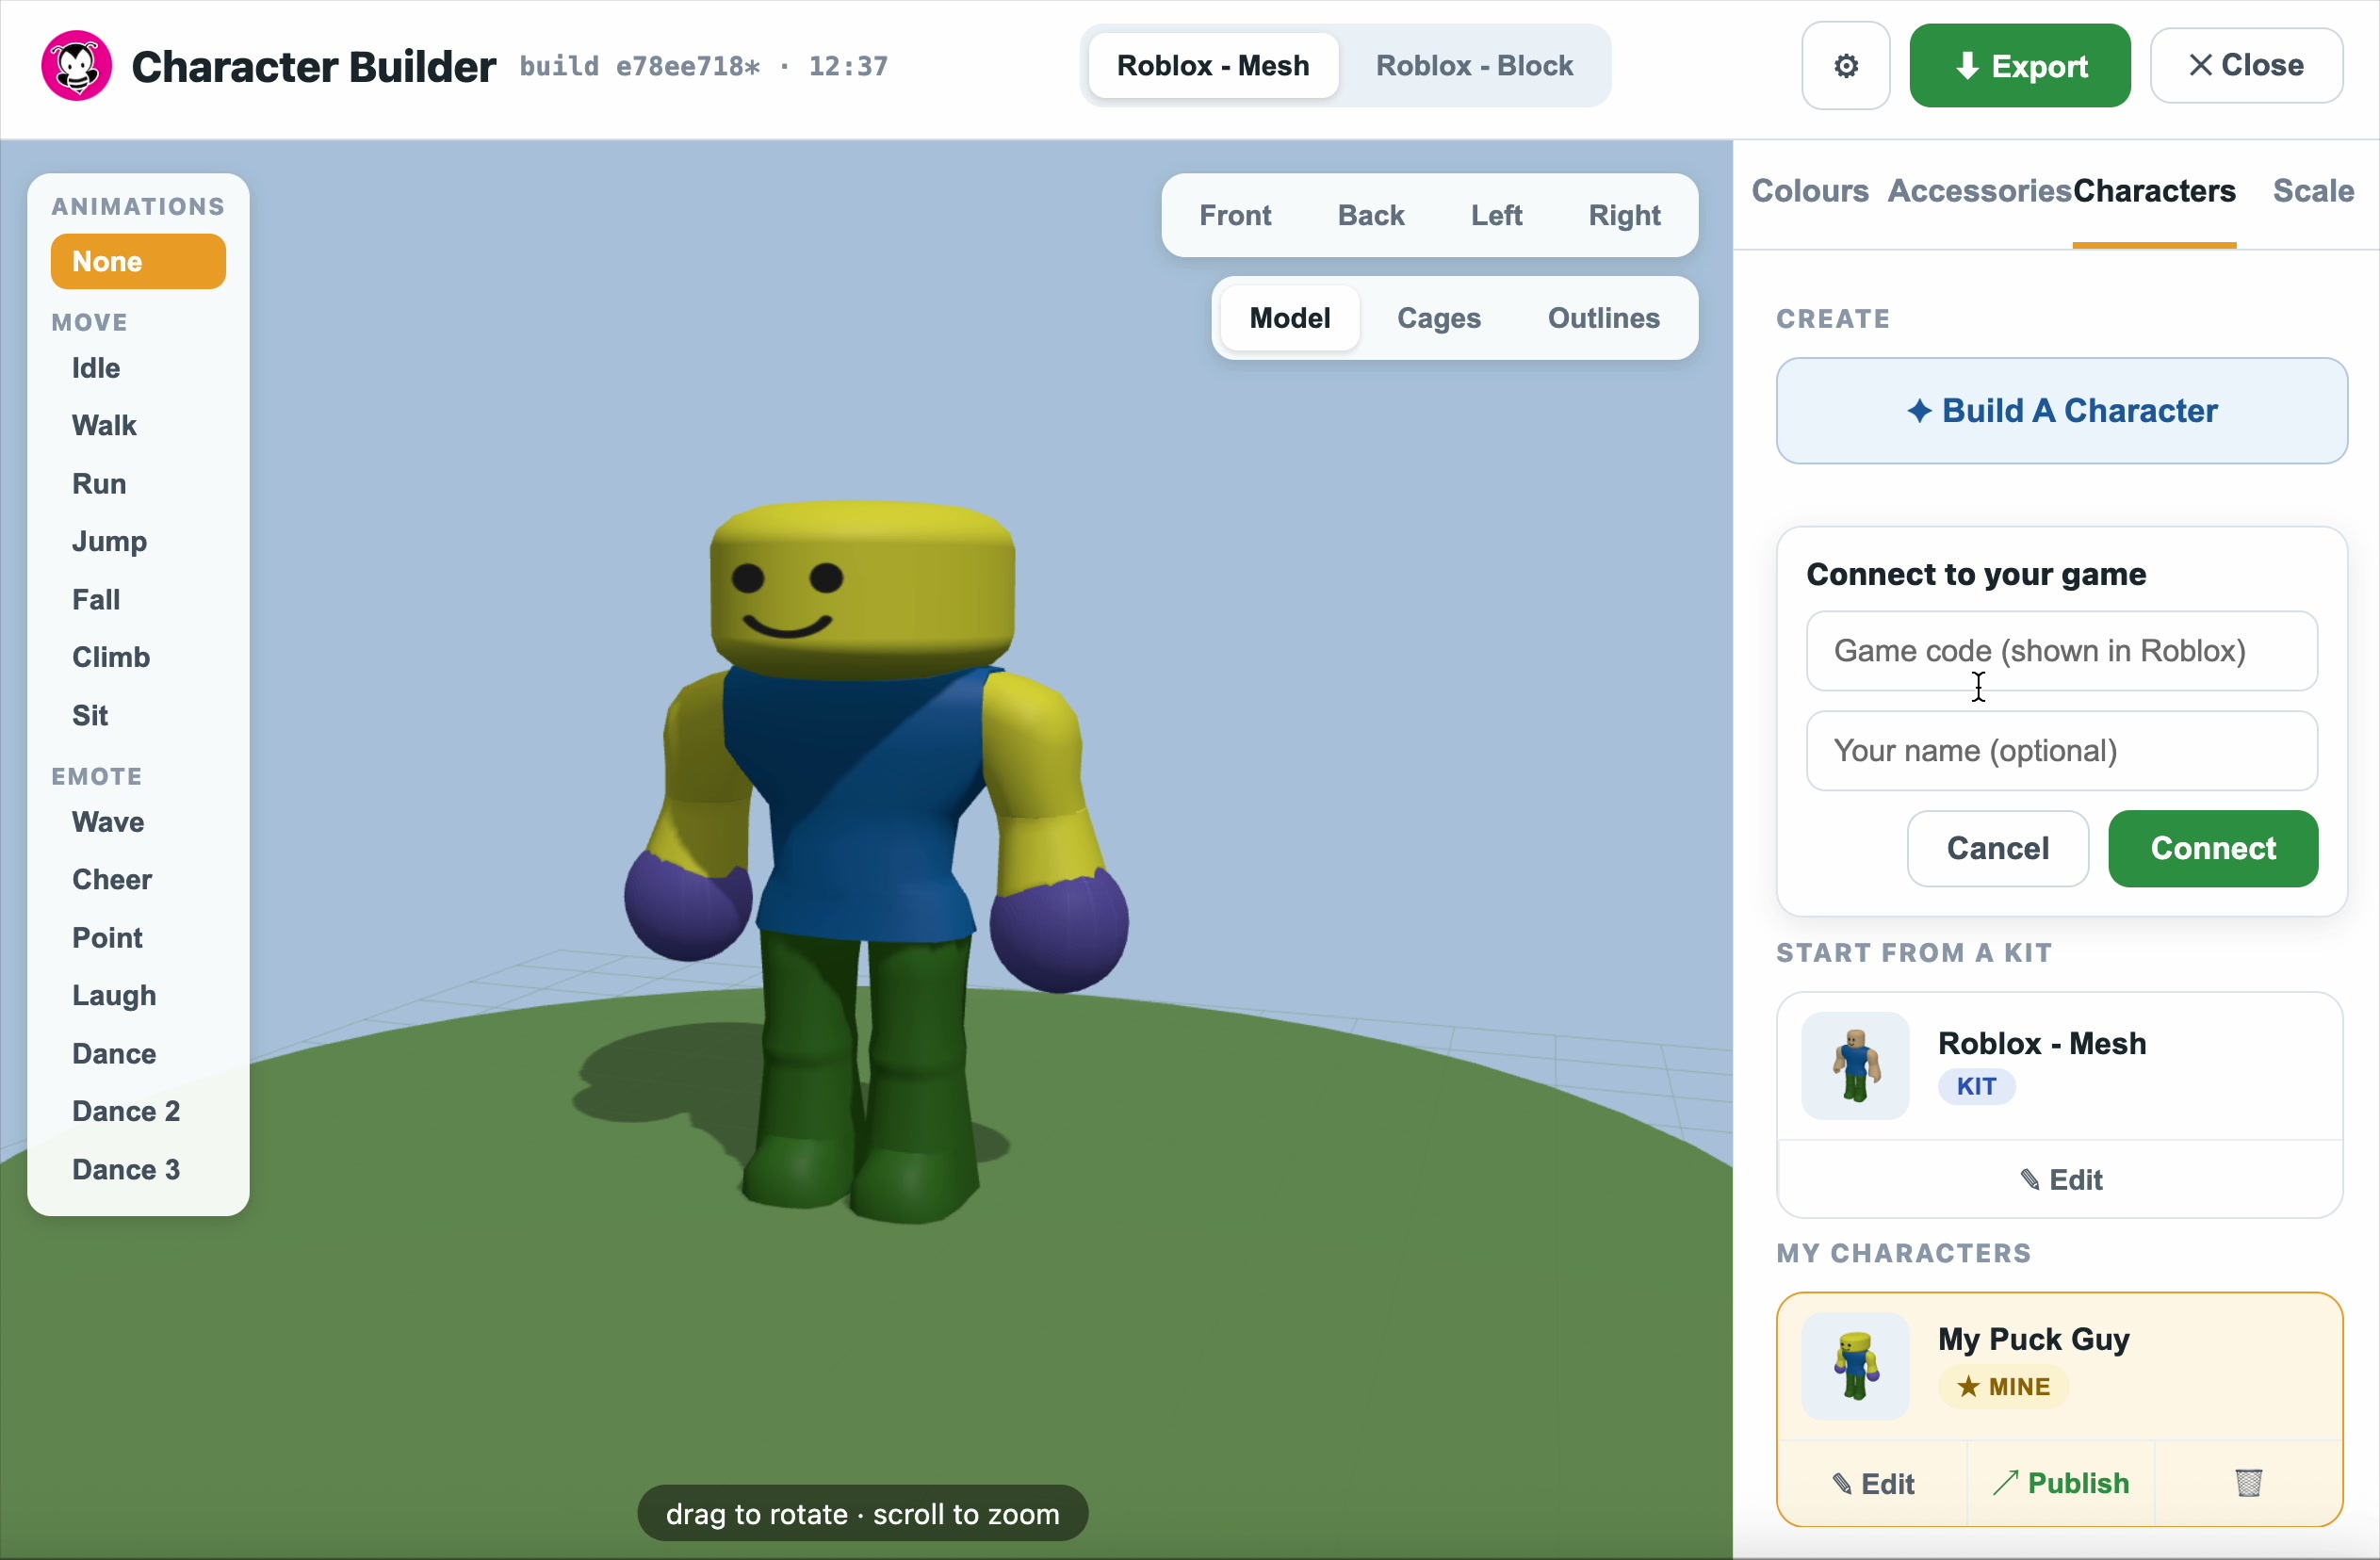
Before you can publish, connect the builder to your game:
- Click Connect to your game
- Enter your Game code (shown in Roblox) and your name
- Click Connect
7. Publish into your game
- Find your character under My Characters
- Click Publish
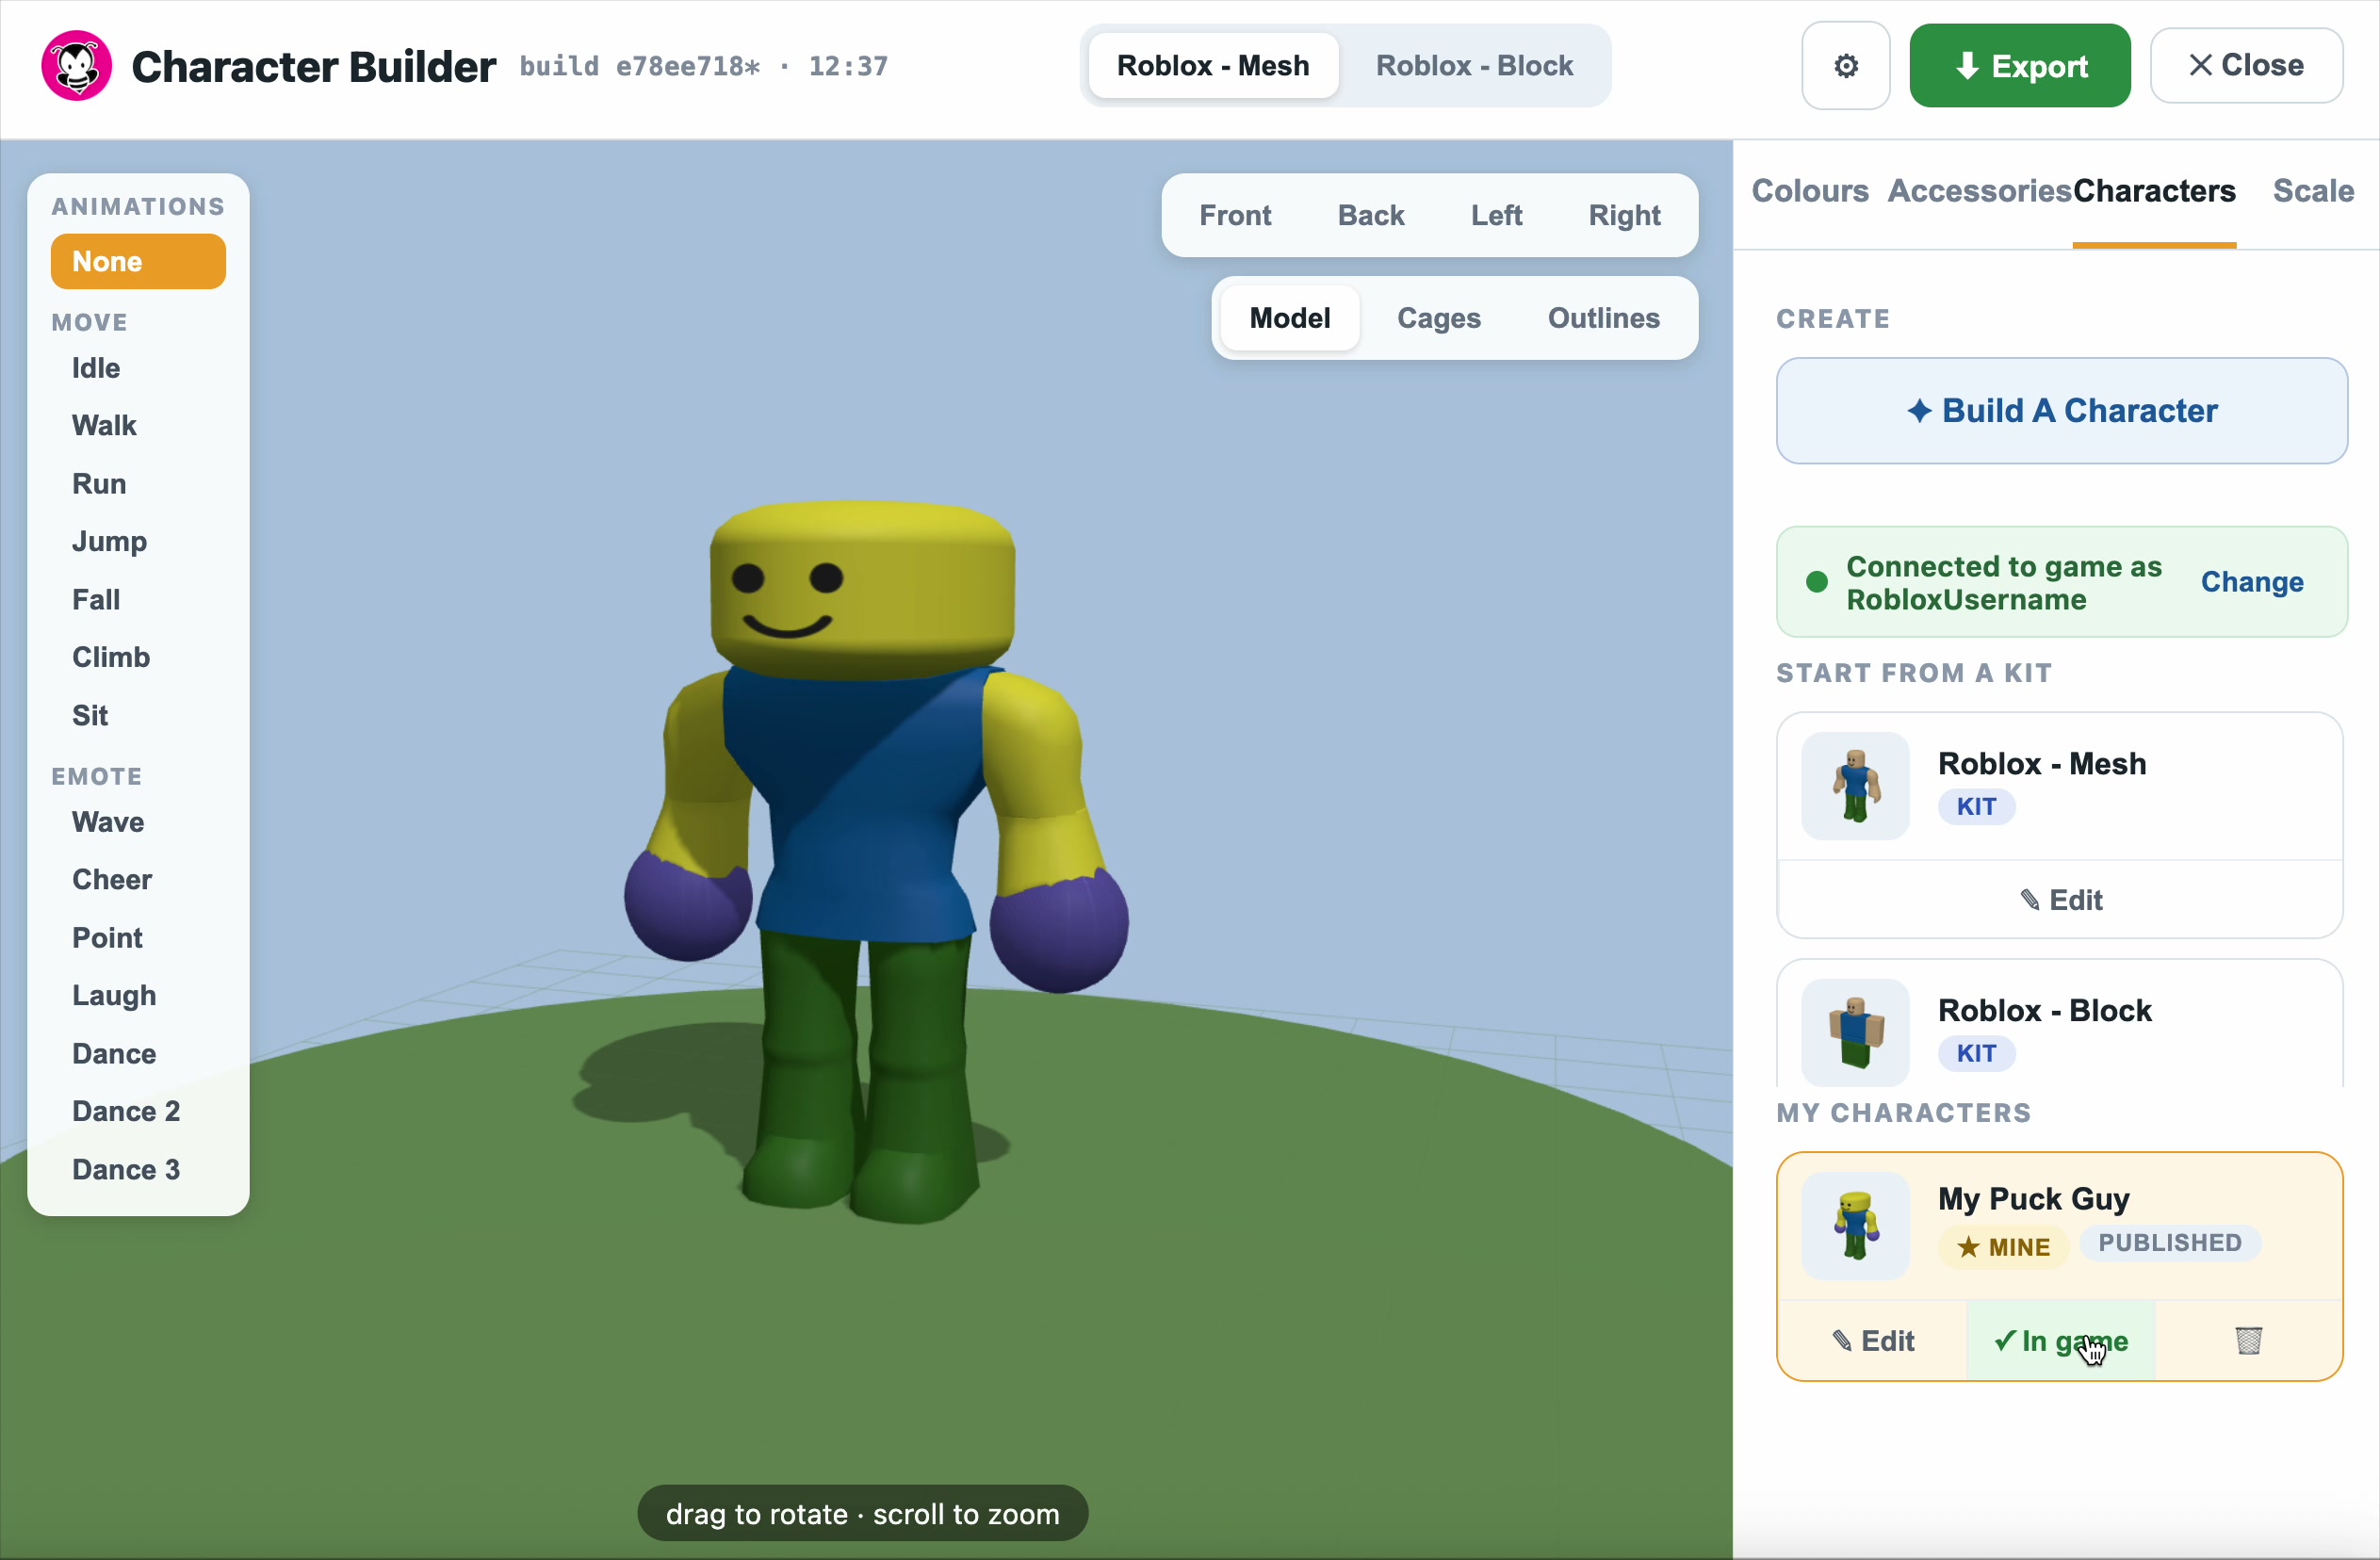
Your character is now in the game — the card shows Published and a green ✓ In game, and the builder shows Connected to game.
That's it — you've built and published your own custom Roblox character. Jump into your game to see it in action! 🐝